Finally I got around to post part 3 of #thesweaterchallenge. Did I mention this is “slow” fashion? 😀
So this is the first cap I have done with making a pattern first. Because I didn’t make a try first the pattern was not flawless and I had to make some tweaks during the process. Buut I have fixed it for for and I will break it down for you so you get the better part of this DIY. Making mistakes is a important part of the learning process 😉 ❤
What you need
Cap
- Sweater for redesign
- Measuring tape
- Baking paper or pattern paper
- Pins
- Rulers, straight and bent
- Sewing needle or sewing machine
- Thread in matching color
- Fabric paint
- Small paintbrush
- Sissors
Bow
- Lace approx 2 cm wide
- Ribbon 1,5 cm wide
- Ribbon 0,5 cm wide
- Sewing needle
- Thread in matching color
- Pins
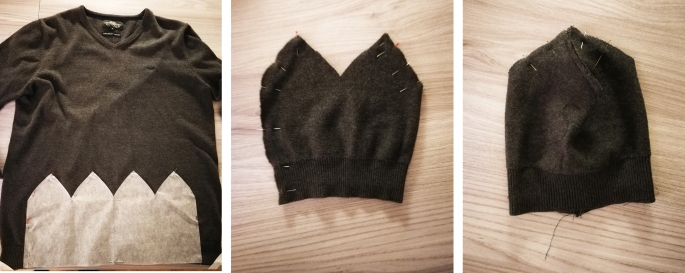
- The first thing I did was creating a pattern for the cap. I used baking paper 😉 The length of the head plus seam allowance made 41 cm. Height was 21 cm. Make a square with a ruler, then divide this into 4 equal parts (41 / 4 = 10,25 cm). Mark the middle of each square 5,1 cm. Along the height of each square measure 11,5 cm, from this point use a rounded ruler and make a line from this point onto the middle of each square (your pattern will look a little different from mine, since I was a little to lazy to do a try cap first, I just fixed the shape directly while sewing) Cut out the pattern, attach to the fabric with pins. Then cut out your fabric.
- Pin the ends together as shown on the picture. Then sew it together using a sewing machine with a elastic seam or do it by hand. Stop approx 0,5 cm from the top.
- Fold the cap the other way, pin and sew it together. Here is where you see the shape of the shape of the cap, if you think the corners are to sharp then you can adjust that by rounding the corners a little more.
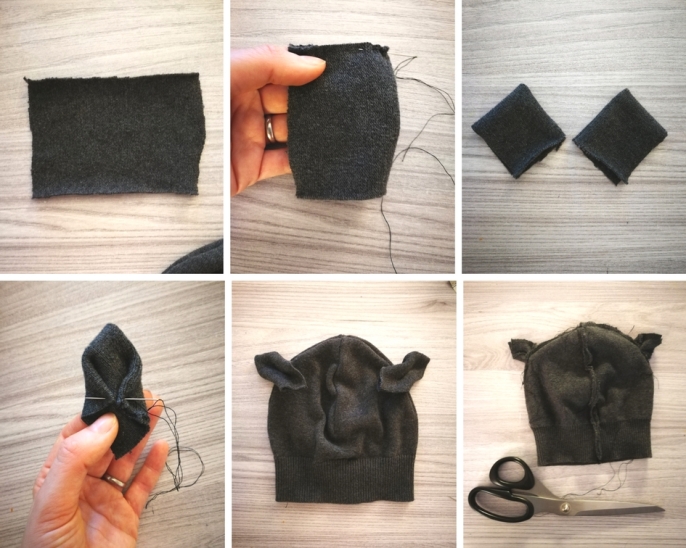
Making the ears
- Cut out two pieces of fabric that is approx 10 x 10 cm (mine was 10 x 8 cm, I wanted to use some leftover fabric )
- Fold the longest part in two, and sew one side. Do the same on the other piece
- Fold the inside out, then iron it.
- Then fold the corners into the middle, Hand sew the corners together going through the fabric in the front as well. Then the ears will not look so flat in the front.
- Figure out the placement on the ears on the cap. Measure the same from the top on both sides. Cut open and insert the ears. Sew the cap back together.
- Use a scissor and cut off the extra of the ears on the inside, and any loose threads.
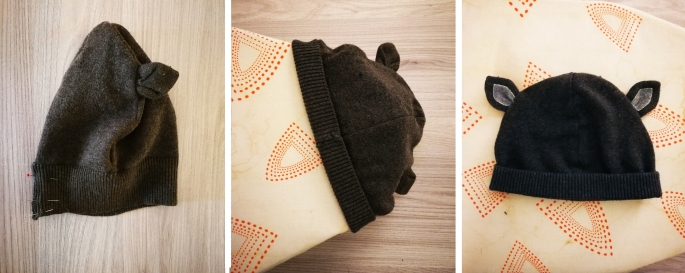
Folding the rib
- If the rib will be folded, it would look prettier if the seam is not visible. Cut open the seam in the back. Fold the seam-allowance outwards, make a tiny cut (0,3 cm) where the rib starts. This will make the seam look prettier on the outside. 😉
- Measure the fold before ironing. Mine is double, so in the end it measured 3 cm.
- To make the fold stay, sew small point stitches along the inside of the cap. I think I had 5 points where is stitched the rib to the cap.
And yeah, as you see I decided to paint the ears white in the inner part. Very easily done with fabric some fabric paint and a paintbrush 😉
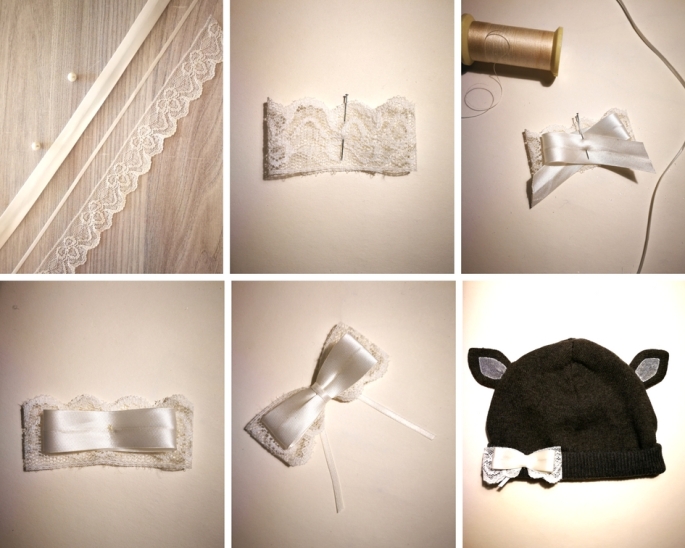
Making the bow
- Choose your materials. I wanted the materials to show, so I chose the lace and the ribbons in different sizes.
- Choose the size of the ribbon. and cut the total length of it mine is 16 cm. This makes it 7 cm when it is folded. Make sure the overlap is in the back. Hand sew one stitch to make it sit.
- The second ribbon is a little bit narrower and smaller, it is folded in 3 and total length is 24 cm. When it is folded it measures 6 cm.
- Place it and stitch it together with the lace.
- Then I cut the last ribbon, total length 18 cm. I tied it around the bow, and tightened it. Making sure the knot was in the back.
- Then I placed the bow on the cap and hand stitched it on. I cut the ribbon that was hanging from the cap and sealed the ends with a lighter.
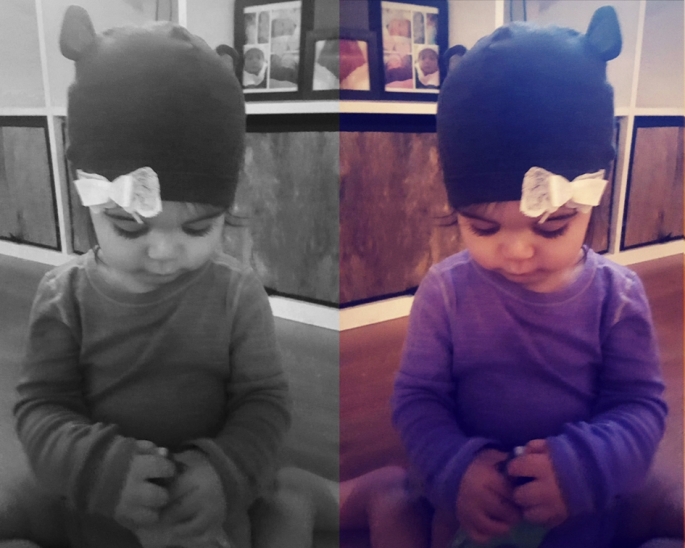
The end ❤ Place work of art on cute baby ❤