Patch it UP

Patch it up (1)
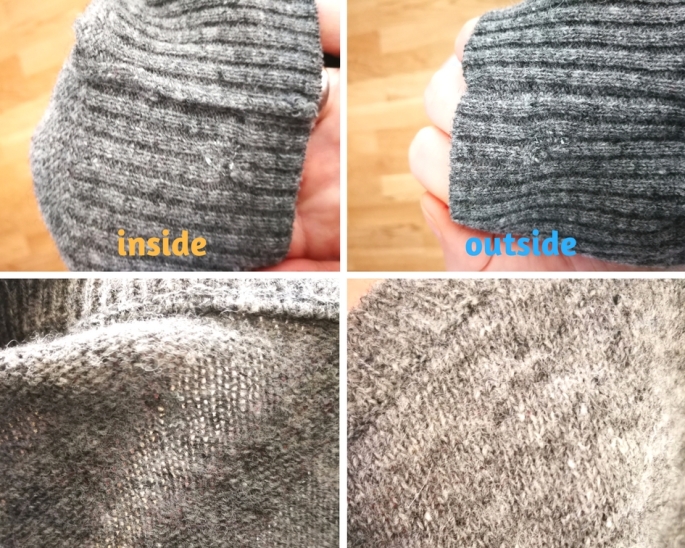
Do you have kids? If you do you would know all about how fast they wear out clothes. It’s insane, my son is 4 and he can break a pair of pants by his 3rd wear. Always on the same knee. As a parent I really don’t want to buy clothes all the time. The amount of clothes you have to buy just because of growth is crazy. That is really not sustainable, or good for your wallet. But there are some things you can do, like clothes swapping, buy used and YEAH fix things when they are broken!! ❤

When you do buy new things, buy things with good quality and opt for the options that causes the least harm to the environment. The options are starting to become more available, as the trend of eco-consciousness is reaching the chains as well. (Finally) ❤️😊

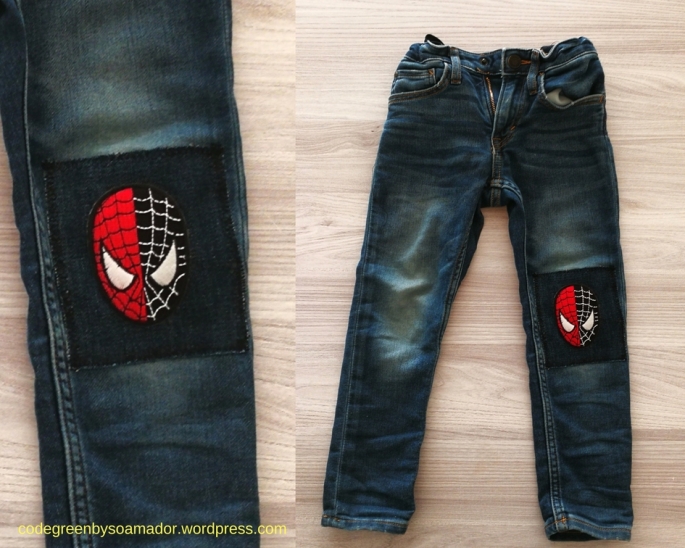
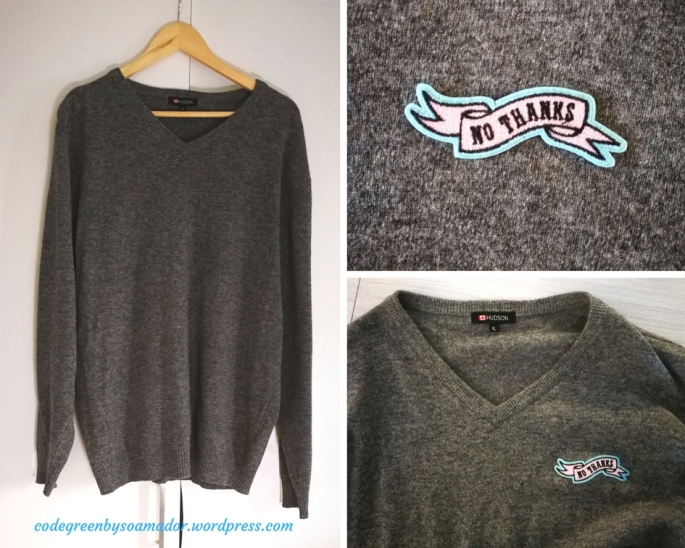
Anywayz lets get back to patching. This is such an super easy fix for en-longing the life span of your clothes, not only pants but jackets as well. If you add a patch with your kids favorite superhero. The item is not only fixed, it is upgraded to the coolest item in the wardrobe.

What you need;

  • The broken pants or jacket
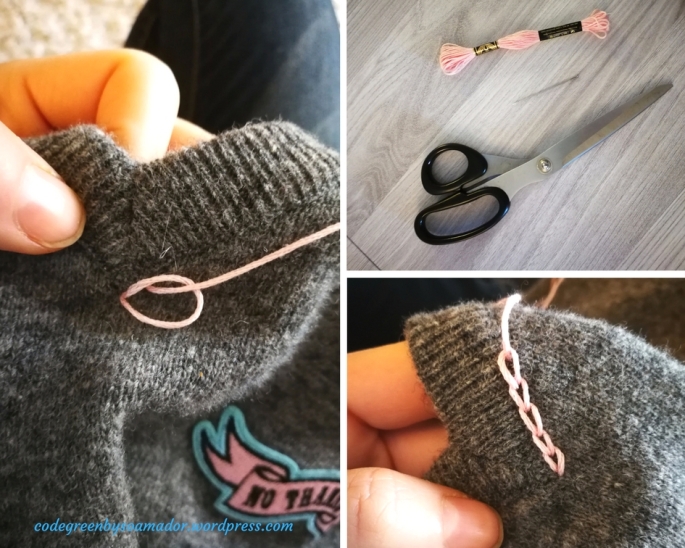
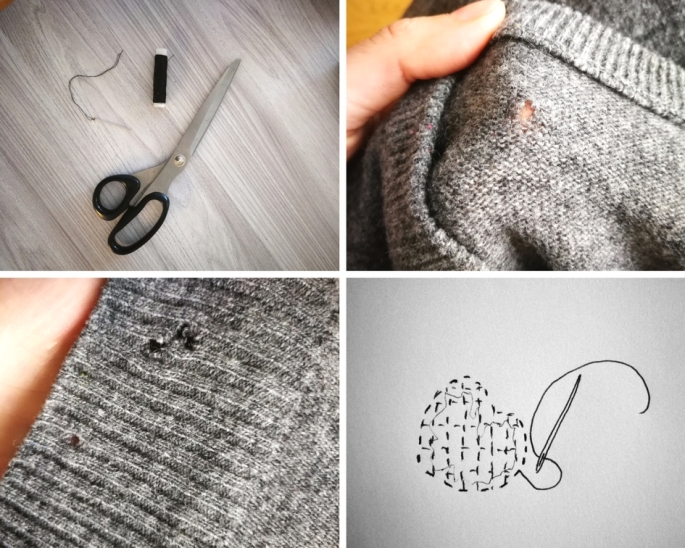
  • 1 pair of sissors
  • Chalk
  • Ruler
  • Sewing machine
  • Thread
  • 1 piece of fabric in the same thickness as the broken one
  • 1 iron-on patch with a motive
  • 1 cloth to cover the iron on patch
  • 8 pins

Design uten navn (5)

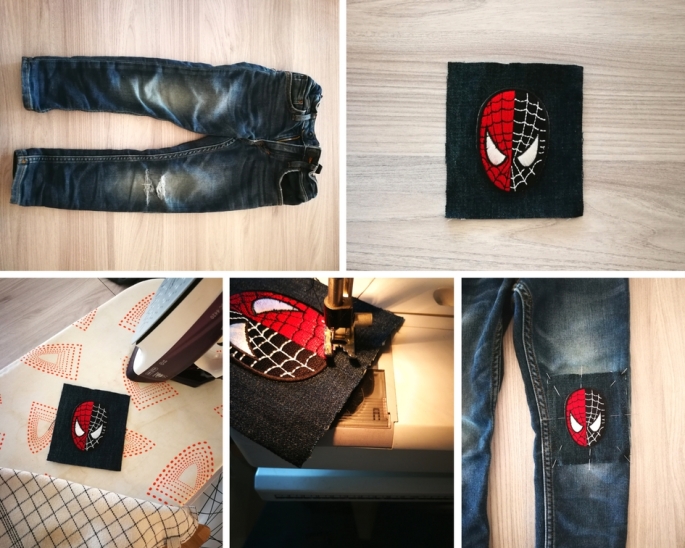
  1. Measure the hole and add a couple of centimeters to be sure the patch will cover up the hole. Draw up the patch on the back of the piece of extra fabric, using chalk and a ruler. Cut it out.
  2. Place the iron-on patch in the middle of the patch. Set the iron to cotton. Cover the patches with the cloth. Iron for 30 sec to 1 min. Do the same on the back of the fabric.
  3. Sew a straight seam around the iron-on patch, just to be sure it does not fall off. Sew a zig-zag around the edge of the patch. width 5 mm and length 3 mm works well as a a setting.
  4. Pin the patch over the whole. Remember to lay the pants flat before you start pinning.
  5. Sew on the patch using a straight seam close to the hem. Sometimes the clothes are really small and navigating with a machine can be hard. Then using a needle and thread, stitching it on by hand is way easier.

So easy, don’t you think? Ruined pants become like new, just with much more personality and love in them ❤

I hope you liked this tutorial. Thx for reading ❤

codegreenbysoamador.wordpress.com (5)


Sweater weather

codegreenbysoamado (5)2So finally it seems like winter is upon us. The degrees have fallen below 0 in the couple of days and the first snow has arrived. The need for warm sweaters, hot tea, blankets and flickering candles is real ❤

So since the latest wool sweater I bought had been attacked by moths, I thought it needed some extra love. So I decided it should have a upgrade and a pinch of color. (I need color, all grey just makes me sad)

I will show you a super easy way you can upgrade your sweaters, and seriously it doesn’t take that long either 😉

What you need

  • Patch in your preferred design
  • Iron
  • Iron-board (or use a towel)
  • Pins
  • Cloth (to cover the patch)
  • Needle
  • Yarn for embroidery
  • Scissors

codegreenbysoamado (1)

Iron on the patch

  1. Start with placing your patch. To be sure of the placement, pin it in place and try on the sweater so you know it looks alright.
  2. Then set your iron to cotton (low) with no steam. To make the glue set you need a high temperature even if the fabric is much gentler, like wool. Cover the patch and the sweater with a cloth and iron it for 30 sec to 1 min. let it cool and check if it stuck to the fabric. If not repeat the process.
  3. turn the sweater inside out, cover with a cloth. Then iron the back of the patch.

codegreenbysoamado (2)

Sew loop hem around neckline

  1. Cut off around 50-70 cm from the yarn. Prepare the thread by making a knot on the end. Thread the yarn into the needle.
  2. Decide where you want to start the hem. I recommend that you start in the V on the V-neck or on the shoulder seam if you have a round-neck sweater.
  3. Pull the needle through the fabric, fasten the thread by pulling the thread until it stops by the knot. Then put the needle back in the same hole back through the fabric. Pull the thread until you get a little loop. Decide the length of the stitch, mine is approx 4 mm, and make sure your thread goes through the loop. Pull the thread so the stitch sits naturally on the fabric.
  4. Next, you make a loop again by putting the needle back in the same hole as the tread. Repeat until you have sewn around the neckline. Fasten the tread with making a knot on the back of the fabric.

Then it is d.o.n.e!  It doesn’t have to be much to make a piece of clothing unique and personal.

Thx for reading and enjoy my goofy looking face. The sweater turned out pretty good though.  ❤ This one will definitely be a good friend this winter.


codegreenbysoamado (4)

What ya gonna do when the moth comes for you….

The Lilypad (2)

And for your favorite sweater? Cry for sure, and then throw it to the trash!

NOooooNOOOOoo. No need, it is fixable ❤

So first let me tell you a little about moths. Moths are creatures of the night spawned by demons that only eat your favorite wool and silk items or other fabrics made of protein. They are the evil and older sibling of the butterfly. They only eat your clothes during infancy, when they grow up they stop eating all together. Though some of them enjoy a sip of nectar now and then. But to continue their vicious cycle of destruction  they will lay their eggs in other beautiful pieces of fabric.


There are several ways to fix a moth whole and it depends on the material.

  1. If you have a big knitted sweater you can use the same colored yarn to fix it, I will include a link to a designer duo who is great with knit and show you how to fix your big knitted items here.
  2. You can add something on top of the whole, like a patch or if you are skilled with a needle you can make an embroidery.
  3. Add a piece of another material that has the same structure as the one that broke. Thin jersey works best with thin jersey and so on. Zigzag it together, hand stitch or use another elastic seam on your sewing machine. This is a great way if you have to patch up big wholes in your clothing.
  4. Or you can weave it together. It will not be as elastic as if you “knit it” back together. But it works better for smaller holes and very thin knitted materials. I will show you a tutorial on this method;

What you need:

  • Needle
  • Sizzors
  • Thread in matching color

Design uten navn (3)

So you see my holes, they are pretty small, but left unfixed the material will rip easily, making long stripes (so much harder to fix then). My technique is more like weaving.

You hand sew around the hole first, then tighten it a little to make the hole smaller. Then you sew up and down vertically, strengthening the material. Then you do the same horizontal.  I learned to fix wool socks from my mother with this technique 😉

Do you see where I fixed? I think it turned out pretty good even though my thread was black and not grey. The fun thing is that probably NO ONE will even notice the little uneven spot on the sleeve. You really have to have a trained eye for details to see that.

front

Strive for progress, not perfection


So what can you do to prevent the moth to devour the rest of your closet? 

-First you should freeze your suspected clothes. The eggs die at -8 degrees. Laundering is also an option for your pieces that can handle high temperatures. The moths do not eat fibers like cotton and bamboo or synthetics, but the eggs can hatch there and then they work their ways to the goodies by crawling. So its a good idea to wash it all.

-Deep Clean your wardrobe, they love the dirt and dust but hate soap and water. Vinegar and water also works fine. Clean your closet regularly, especially if you live in warmer climates.

-Before putting your clothes back for storage, clean them. They like old food spill, dandruff and skin particles. For longer storage put your items in cotton bags. Plastic will not let your clothes breathe and they might develop mold.

-Steer clear of mothballs, they contain a pesticide called Naphthalene. It can harm people, your pets and the environment.


Natural moth repellents;

  • Chedarwood, looses its scent and has to be replaced regularly.
  • Lavender is hated by moths for centuries. Use lavender bags or dip cotton balls in essential oil
  • Cinnamon. Replace sticks regularly. Essential oil will also work
  • Cloves also has a repellent effect.

Do NOT use: lemon, mint, eucalyptus and bay leaf essential oils (as well as the dried herbs). They actually seems to feed the moths…. 😦 

Hope you ppl liked this diy moth fixer 😉 ❤