Art Therapy

How are you dealing with this Coronavirus times lockdown? Are you bored? Feeling overwhealmed, scared? Many emotions may come up when facing a global pandemic and they are all perfectly normal, allowed to have, and totally understandable. However, we have to find ways to deal with our own emotions, hard to run from them now right? 😂 Its a great opputunity to get to know ourselves better ❤

I belive that in this times we need to do everything we can to strengthen our natural defences. Eat healthy organic food, connect with nature, get a lot of sunshine, exsercise, medtitate, learn something new, take a beat and breath it out. Do not read news more than 1-2 times a day. Keep the connection with your loved ones by phone or facetime. Remember WHY we are doing this, and that everything will pass soon enough ❤

Another thing that can help dealing with emotions is doing some art. Art used as part of therapy can help manage behaviours, process feelings, reduce stress and anixity, and increase self esteem. Creating art also stimulates the relese of dopamine. (I think we all need some of that about now)

There seems to be a great connection between the expression of art in some form and a better immune system.

Of course if you do have the need for therapy creating art is not a substitute for a psychologist but it can be a helpful addition.

For me it definitely brings a sense of calm in the middle of the storm. For you people home with school kids and partners you know what storm I am talking about 😉

Here is 2 coloring pages I created, and I just wanted to share with you, Working with colors can ceartantly lift your spirit ❤

Lets stick indoors together and keep on sharing inspiration with eachother. ❤

I-scream bites that your gut loves ❤

So this is my new go to snack when I am craving something sweet. Truth is that I almost finished the first batch alone b4 anyone got to taste 😂❤

It is totally sugarfree, all natural and no chemicals 😱 nutricious and makes your gut happy. But the taste is still amazing. My son screamed in amazement that this was the best icecream he have ever had in his life. He might be brainwashed by our healthy lifestyle, but as a mom I take it to heart ❤ this kind of statements are long inbetween 😂

This icecream is 2 layered and the combo is what makes it so yummi.

What you need

Chocolate cream

  • 3 lups of organic cacao butter
  • 1 dl of coconut cream
  • 1 spoon of inulin or fiberfin
  • 1,5 spoons of organic cacao
  • 1 spoon of grass fed collagen
  • 60 drops of stevia
  • 0,5 teaspoon of organic vanilla powder

Vanilla cream

  • 2 organic eggplums
  • 150 gr organic butter
  • 1 dl of coconut cream
  • 0,5 teaspoon of organic vanilla powder
  • 30 drops of stevia
  • 1 spoon of organic lemonjuice

First preapare the choclolate batch, by melting lumps of cocoa fat in a water bath. Add the rest of the ingredients and blend well whith a handheldt mixer. Line a loaf pan with baking paper and pour the mix in. Save a little chocolate mix for the topping. Snap it in the freezer and let it sit for 30 min.

When when that is turning frozen, prep the vanilla egg cream. Melt the butter on slow heat or in a waterbath. Mix the 2 egg plums with the butter slowely, so it doesn’t seperate. Then add the coconutcream little by little and mix in the rest of the ingredients.

When the chocolate is solid enough pour the vanilla cream in. Then spread the rest of the saved up chocolate (you might have to heat it up a lite) and make a cool pattern by stiking a knife into the batter. Pop back in the freezer and let it rest for 45 min before you eat it all by yourself, and have to make a new batch becouse you forgot to share some with your friends and family ❤

Then what you have left you can cut into little squares and store in the freezer, ready for when you need a icecream-fix.

Enjoy, everyday and guilt free❤

Patch it UP

Patch it up (1)
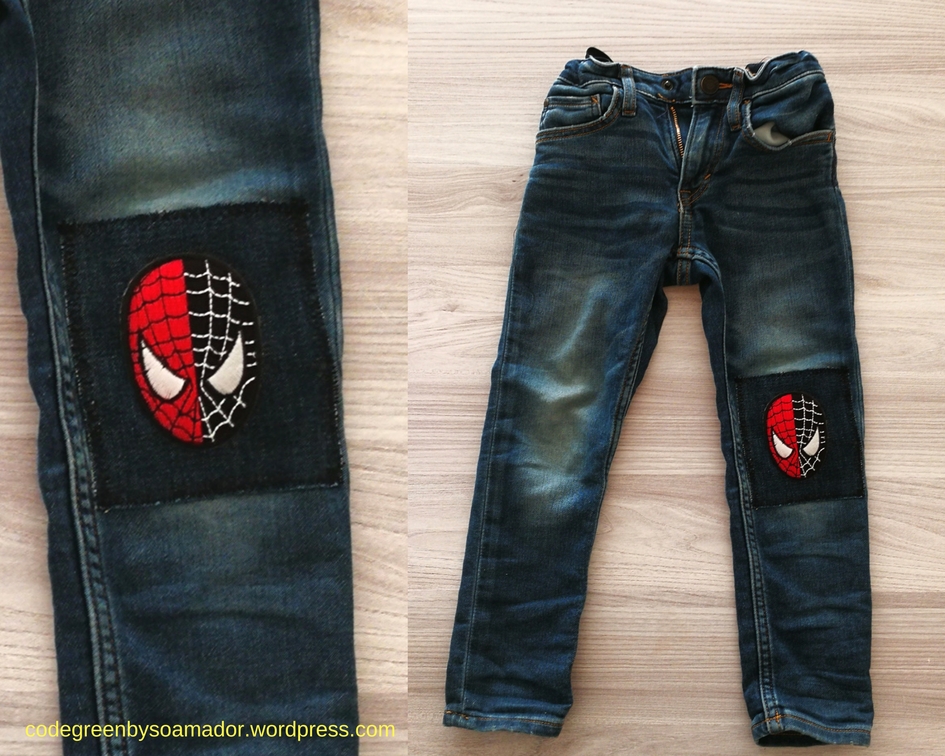
Do you have kids? If you do you would know all about how fast they wear out clothes. It’s insane, my son is 4 and he can break a pair of pants by his 3rd wear. Always on the same knee. As a parent I really don’t want to buy clothes all the time. The amount of clothes you have to buy just because of growth is crazy. That is really not sustainable, or good for your wallet. But there are some things you can do, like clothes swapping, buy used and YEAH fix things when they are broken!! ❤

When you do buy new things, buy things with good quality and opt for the options that causes the least harm to the environment. The options are starting to become more available, as the trend of eco-consciousness is reaching the chains as well. (Finally) ❤️😊

Anywayz lets get back to patching. This is such an super easy fix for en-longing the life span of your clothes, not only pants but jackets as well. If you add a patch with your kids favorite superhero. The item is not only fixed, it is upgraded to the coolest item in the wardrobe.

What you need;

  • The broken pants or jacket
  • 1 pair of sissors
  • Chalk
  • Ruler
  • Sewing machine
  • Thread
  • 1 piece of fabric in the same thickness as the broken one
  • 1 iron-on patch with a motive
  • 1 cloth to cover the iron on patch
  • 8 pins

Design uten navn (5)

  1. Measure the hole and add a couple of centimeters to be sure the patch will cover up the hole. Draw up the patch on the back of the piece of extra fabric, using chalk and a ruler. Cut it out.
  2. Place the iron-on patch in the middle of the patch. Set the iron to cotton. Cover the patches with the cloth. Iron for 30 sec to 1 min. Do the same on the back of the fabric.
  3. Sew a straight seam around the iron-on patch, just to be sure it does not fall off. Sew a zig-zag around the edge of the patch. width 5 mm and length 3 mm works well as a a setting.
  4. Pin the patch over the whole. Remember to lay the pants flat before you start pinning.
  5. Sew on the patch using a straight seam close to the hem. Sometimes the clothes are really small and navigating with a machine can be hard. Then using a needle and thread, stitching it on by hand is way easier.

So easy, don’t you think? Ruined pants become like new, just with much more personality and love in them ❤

I hope you liked this tutorial. Thx for reading ❤

codegreenbysoamador.wordpress.com (5)


From size L to M

Kopi av top 20mobileapps (2)

So I went shopping the other day at the local thrift store and came across a beautiful shirt in Viscose which is a 100% pure nature product. It had the tag on, so it was not even used. When I put it on I definitely could understand why. It is one of these trend items that has one season and then the shape or design has lost its appeal. So many clothes gets thrown to the thrash each year just because of that. Just here in Norway we throw away 113.000 ton of textiles each year.

So in my strive to create less trash I rather buy used clothes and fix them up a bit. Small alterations to a piece of clothing can make a RAG into FAB ❤

Did you know-

So this gorgeous goldfish printed shirt had a volume to fit approx 3 of me and a great shape if you have a humpback. Since I don’t have either, I wanted to size it down and get rid of the pleat in the sides of the back. I still want to keep some volume, but make it more wearable and timeless to fit into my closet.


This is an easy alteration operation you can apply to any blouse or men’s shirt. Just skip part 1 – 4, and move directly to part 5.

Design uten navn (2)

What I used;

  • An iron
  • A ironboard
  • A pair of scissors
  • Some pin needles
  • A sewing machine
  • White thread
  • 1 Long ruler
  • 1 Rounded ruler
  • 1 Colored chalk pencil


  1. I laid the blouse flat on the floor, then I cut off the side seam up to approx 5 cm from the armhole.
  2. Then I let the back pleat down, and gave it a little Ironing to make it totally flat.
  3. I removed the pleat just by drawing a new line from the edge of the fabric, and then cutting the extra fabric off.
  4. Then I used needles to pin the front and the back together again.
  5. When I had decided how much I wanted to remove from the volume (4 cm on each side), I marked that off on the fabric, and made sure it got a nice curve into the armhole.
  6. I wanted to have a split but still keep the length in the back, so I marked off  6 cm from the front end and up. Then I sewed it together by using a straight seam. After that I cut off the extra fabric, leaving 1 cm of the raw edge to overlock or zigzag. I used zigzag until the start of the split. Then I had to cut into the fabric very close to the seam, to be able to fold the hem to each side. Then Iron and pin the hem.
  7. Then I sewed the hem around the slit, but I should have sewn it even closer to the split to strengthen the seam. (I will do that later) Then Voila! Done! Got me a new fishy blouse ❤v c (1)

What do you think? Would you dare to try to do something like this?


Pimp my Ballerina

pimp my ballerinas
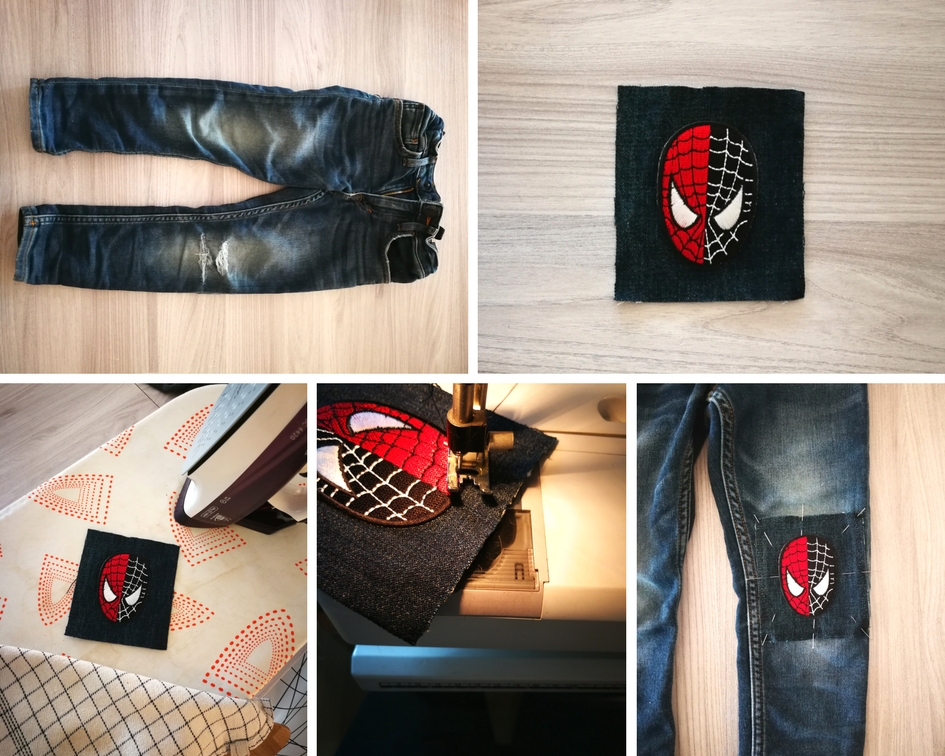
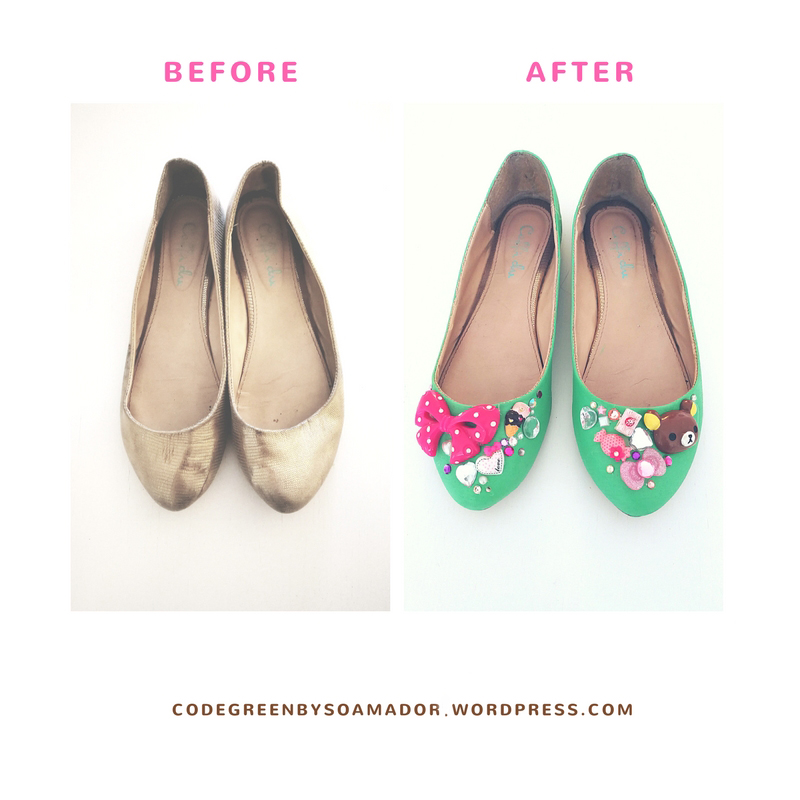
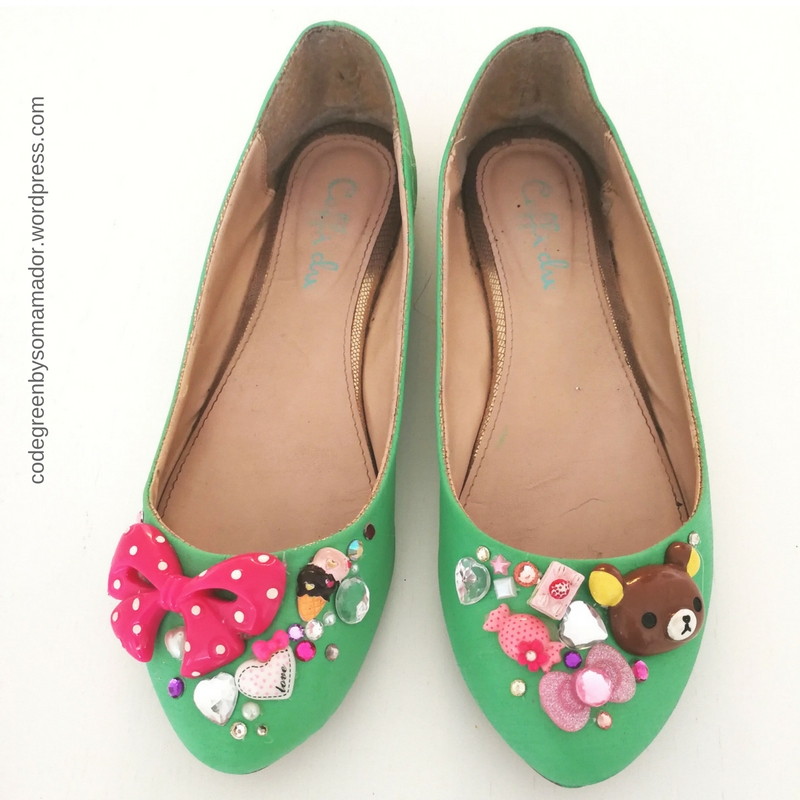
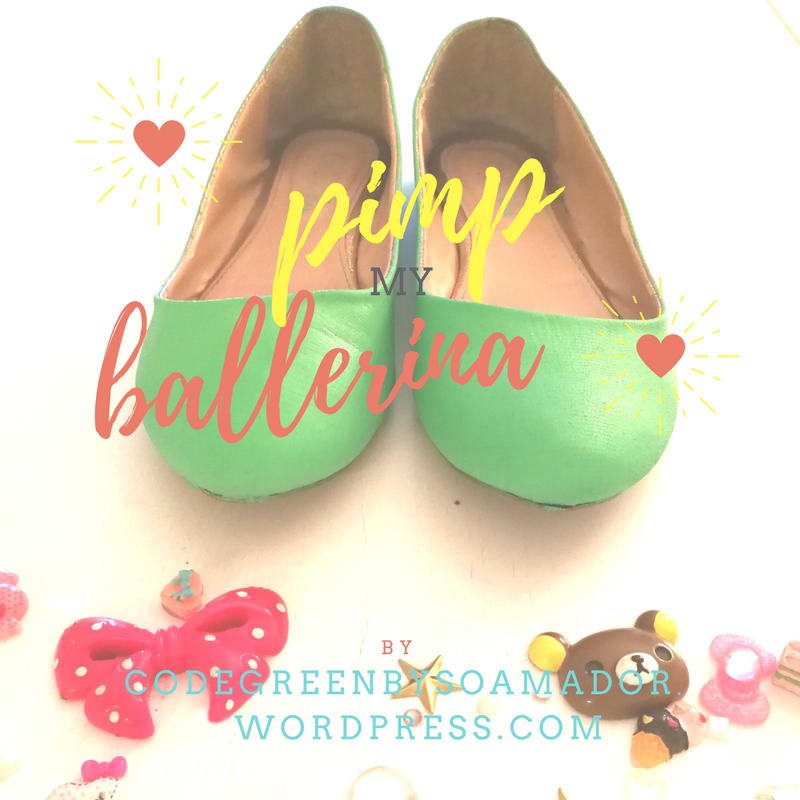
In the fight against throwing more stuff I figured I wanted to en-long the lifespan of my old ballerinas. I loved them so much, and it is starting to show.  So instead of thrashing them I up-cycled them. A little bit of paint, glue, and pieces of a old iPhone cover. I have “new” and totally original ballerinas for this summer. Magic. I love saving old crap that can be used for something else, it is so cool when you can transform it into something else.  You can also do this too super easy.  With the use of old jewelry, or whatever else you might have laying around that can be used for decorations. I will share my process with you so you can do the same ❤

ChocolateIce CreamDay

What I used

  • Fabric paint
  • Textile glue
  • Masking tape
  • Sponge
  • Paint brush
  • Old pieces of a iPhone cover
  • Iron set on cotton
  • Old cotton t shirt or pillow cover

What I did

  1. I made sure the shoes where “clean enough”, then I used the masking tape to separate the sections where I wanted the paint. The inner part and the soles should be paint free.
  2. Then I mixed my color, I used fabric paint and that works best when you have fabric shoes. Use paint that works for the material your shoe is made of.
  3. Paint the shoes with a sponge not the paint brush. I used a dotting motion all over the shoe. I do not want paint stripes like the brush tend to give. When they dried I gave them a second layer.
  4. When I removed the tape I discovered that some places lacked paint.  I then used a one place
  5. Go crazy with glue and accessories.
  6. Enjoy your masterpiece ❤

I hope you enjoyed this latest pimpin. I want to post more blogs a little more frequently  as long as my health and life plays along <<<<<<<<<<3

big pic

Wool Soles DIY

So while it is the end of March and we are entering into spring mode, the weather still varies a lot here in Norway. If you are a cold fish like me, you would appreciate to have warm feet in these oh so cold mornings.

I wanted to share a easy way to reuse some old woolen slippers. Instead of throwing them away, this is a super easy way to reuse the material.

All you need is:

  • a pair of old woolen slippers
  • an old shoe sole in your size
  • a pair of scissors
  1. cut the slipper in two, so it lays flat on the table.
  2. lay the sole on top of the slipper, and cut around the shape
  3. blog 1.2

TADAAAA! YOU now have new woolen soles ❤

blog 1.31

Ohyeah, the shape does not always come out perfect, but no one will see that in the bottom of your shoe 🙂